Attachments Node
This node, under External Objects in the Workflow Administration Console, lets you view attachments. Attachments are files on the Workflow Server that workflows can reference. ![]() See an example.
See an example.
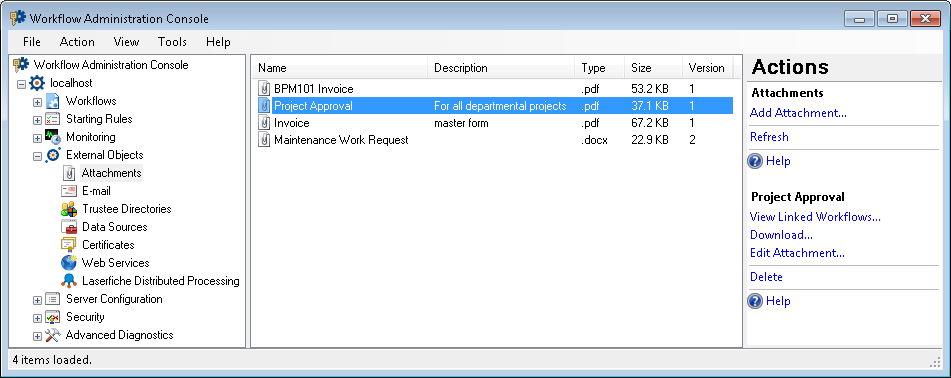
In this node, you can view an attachment's name, description, type, size, and version number. You can also see which workflows reference an attachment, and you can add, download, modify, and delete attachments.
Note: Attachments are saved in C:\ProgramData\Laserfiche\WF\ServerData\$ on the Workflow Server. You can configure the root of this path in the Workflow Server File System step of configuring the Workflow Server.
To open this node
- In the Workflow Administration Console's Console Pane, expand the External Objects node.
- Select Attachments. The node will list all the attachments on the Workflow Server.
Tip: You can refresh this list to reflect recent changes by clicking the Refresh link below Attachments in the Actions Pane. Alternatively, right-click the Attachments node and select Refresh.
To view the workflows that reference a specific attachment
- In the center Details Pane, select an attachment.
- Click View Linked Workflows under the attachment's name in the Actions Pane, or right-click the attachment and select View Linked Workflows.
- The Linked Workflows dialog box will show the name, description, and version of the workflows that reference the attachment.
To add an attachment
- In the Console Pane, select the Attachments node.
- Click Add Attachment under Attachments in the Actions Pane, or right-click the Attachments node and select Add Attachment.
- Browse to your desired attachment, and click Open.
- Optional: In the Add Attachment dialog box, change the attachment's name, and/or provide a description of the attachment.
- Click OK.
To download an attachment
- In the center Details Pane, select an attachment.
- Click Download under the attachment's name in the Actions Pane, or right-click the attachment and select Download.
- Browse to where you want to save the attachment.
- Click Save.
To modify an attachment
- In the center Details Pane, select an attachment.
- Click Edit Attachment under the attachment's name in the Actions Pane, or right-click the attachment and select Edit Attachment.
- In the Edit Attachment dialog box, click the Replace Attachment File link to select a different attachment. Browse to the desired attachment. Click Open.
- Modify the attachment's name and/or description in the Name and Description text boxes.
- Click OK.
To delete attachments
- In the center Details Pane, select one or more attachments. Hold down CTRL to select more than one attachment at once.
- Click Delete under the selected item's name in the Actions Pane, or right-click the attachment(s) and select Delete.
- Click Yes when prompted to delete the attachment.
To export the contents of this node in a .csv, .xml, or .txt file
- Select the node in the Console Pane.
- Select View from the main menu.
- Click
 Export Contents.
 - In the Export data dialog box, name the exported file.
- Select CSV File, XML File, or Tab Delimited Text File from the drop-down menu.
- Click Save.